Building an Android App with ChatGPT: A Step-by-Step Guide
ChatGPT, powered by OpenAI's GPT-3 language model, has revolutionized the way we interact with AI-powered chatbots. In this article, we will explore how to build an Android app that utilizes ChatGPT to create an interactive and engaging conversational experience. We will walk through the development process, from setting up the environment to implementing the necessary code. Let's get started!
Table of Contents:
1. Setting up the Development Environment
2. Creating the User Interface
3. Integrating ChatGPT for Conversational Interaction
4. Training ChatGPT for Specific Use Cases
5. Enhancing the User Experience with Contextual Understanding
6. Implementing Error Handling and Input Validation
7. Deploying the Android App
1. Setting up the Development Environment:
Before diving into coding, we need to set up our development environment. Install Android Studio, the official Integrated Development Environment (IDE) for Android app development. Android Studio provides tools and emulators necessary for building and testing Android apps.
2. Creating the User Interface:
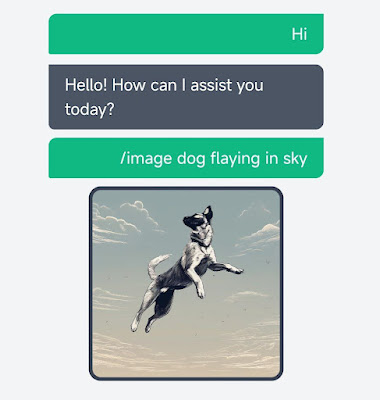
Design an engaging user interface (UI) for the app using XML layouts. Consider elements such as chat bubbles, input fields, and buttons to create a messaging-style interface that resembles a chat conversation. Android Studio's layout editor makes it easy to arrange UI elements visually.
3. Integrating ChatGPT for Conversational Interaction:
Integrate the ChatGPT API into the app to enable conversational interaction. Use libraries like OkHttp or Retrofit to send HTTP requests to the ChatGPT API endpoint. Handle the responses and display them in the chat interface. Implement features like sending messages, receiving responses, and displaying typing indicators.
4. Training ChatGPT for Specific Use Cases:
Training ChatGPT with specific use cases can enhance its understanding of domain-specific queries. Collect and preprocess a dataset of conversations relevant to your app's purpose. Fine-tune the ChatGPT model using techniques like supervised fine-tuning or reinforcement learning. Fine-tuning improves the model's performance and tailors it to the needs of your app.
5. Enhancing the User Experience with Contextual Understanding:
For a more dynamic and contextually aware conversation, implement mechanisms to keep track of the conversation history. Store previous user inputs and ChatGPT's responses in a data structure like a list or a conversation tree. Pass this context along with the current user input to ChatGPT, allowing it to generate more contextually relevant responses.
6. Implementing Error Handling and Input Validation:
To provide a smooth user experience, handle errors and validate user input. Check for empty messages, excessively long messages, or invalid characters that may cause issues with ChatGPT's response. Implement appropriate error messages and validation mechanisms to guide users and prevent any unwanted behavior.
7. Deploying the Android App:
Once your app is ready, it's time to deploy it. Generate an APK (Android Package Kit) file from Android Studio, which can be installed on Android devices. Test your app thoroughly on different devices and screen sizes to ensure it functions correctly. Publish your app on the Google Play Store to make it available to a wider audience.
Conclusion:
Building an Android app using ChatGPT opens up exciting possibilities for interactive and engaging user experiences. By following the steps outlined in this guide, you can create an Android app that seamlessly integrates ChatGPT for natural language conversations. Experiment with different training techniques, enhance the user experience, and continually improve your app's capabilities. Embrace the power of ChatGPT to create compelling conversational apps that will captivate and delight your users. Happy coding!

Table of Contents:
1. Setting up the Development Environment
2. Creating the User Interface
3. Integrating ChatGPT for Conversational Interaction
4. Training ChatGPT for Specific Use Cases
5. Enhancing the User Experience with Contextual Understanding
6. Implementing Error Handling and Input Validation
7. Deploying the Android App
1. Setting up the Development Environment:
Before diving into coding, we need to set up our development environment. Install Android Studio, the official Integrated Development Environment (IDE) for Android app development. Android Studio provides tools and emulators necessary for building and testing Android apps.
2. Creating the User Interface:
Design an engaging user interface (UI) for the app using XML layouts. Consider elements such as chat bubbles, input fields, and buttons to create a messaging-style interface that resembles a chat conversation. Android Studio's layout editor makes it easy to arrange UI elements visually.
3. Integrating ChatGPT for Conversational Interaction:
Integrate the ChatGPT API into the app to enable conversational interaction. Use libraries like OkHttp or Retrofit to send HTTP requests to the ChatGPT API endpoint. Handle the responses and display them in the chat interface. Implement features like sending messages, receiving responses, and displaying typing indicators.
4. Training ChatGPT for Specific Use Cases:
Training ChatGPT with specific use cases can enhance its understanding of domain-specific queries. Collect and preprocess a dataset of conversations relevant to your app's purpose. Fine-tune the ChatGPT model using techniques like supervised fine-tuning or reinforcement learning. Fine-tuning improves the model's performance and tailors it to the needs of your app.
5. Enhancing the User Experience with Contextual Understanding:
For a more dynamic and contextually aware conversation, implement mechanisms to keep track of the conversation history. Store previous user inputs and ChatGPT's responses in a data structure like a list or a conversation tree. Pass this context along with the current user input to ChatGPT, allowing it to generate more contextually relevant responses.
6. Implementing Error Handling and Input Validation:
To provide a smooth user experience, handle errors and validate user input. Check for empty messages, excessively long messages, or invalid characters that may cause issues with ChatGPT's response. Implement appropriate error messages and validation mechanisms to guide users and prevent any unwanted behavior.
7. Deploying the Android App:
Once your app is ready, it's time to deploy it. Generate an APK (Android Package Kit) file from Android Studio, which can be installed on Android devices. Test your app thoroughly on different devices and screen sizes to ensure it functions correctly. Publish your app on the Google Play Store to make it available to a wider audience.
Conclusion:
Building an Android app using ChatGPT opens up exciting possibilities for interactive and engaging user experiences. By following the steps outlined in this guide, you can create an Android app that seamlessly integrates ChatGPT for natural language conversations. Experiment with different training techniques, enhance the user experience, and continually improve your app's capabilities. Embrace the power of ChatGPT to create compelling conversational apps that will captivate and delight your users. Happy coding!


Bro I want know about blogspot website like how run ads in my blogger website.
And please reply to me